
The boss fight: the Alpaca King
A monarch who never fights up close if he can avoid it. He covers his plateau with frost glyphs, then pushes you onto them: whoever ends their turn on one of them is shattered, whatever their HP. But the trap cuts both ways: pushed onto his own glyph, he is the one left stunned, and vulnerable.
In short
- Where — in the menu, the PvE selector, then the Waris boss or the weekly boss in USDC, solo, in a duo or in a trio.
- Him — 14,000 HP and 6 MP: he keeps his distance, spits and pushes, and leaps back when you stick to him.
- The glyphs — 2 permanent frost glyphs per turn; whoever ends their turn on a glyph is shattered.
- The stun — moved by a hero onto one of his glyphs, he skips his next turn and takes 50% more damage.
- The avalanche — every 3 of his turns, announced the turn before, it sweeps the whole plateau in one direction: 35 to 45 damage, and the heroes in the open carried 3 tiles. Behind a rock or a low wall, you are sheltered.
- The evolution — below 50% of his HP, he becomes the Alpaking Evolved: glyphs of 13 tiles and one more charge, Stampede.
- Limit — 50 turns at most: the leaderboard counts the HP he lost.
The Alpaca King
He starts at the top of the King’s Plateau, opposite your heroes, and only comes down to push you back. He has 14,000 HP, whether you are solo, in a duo or in a trio, 14 AP and 6 MP on each of his turns. His passive, Royal Fleece, cushions your blows: 30% permanent damage resistance. His wool also partly resists AP and MP removal, but it does not pin him to the ground: he can be pushed, pulled and swapped like any other fighter. That is the whole key to the fight.
He does not seek melee. When you stick to him, he bucks to send you away, or leaps back; he prefers mid-range, from where he spits and lays his glyphs. His whole game is throwing you onto the frost; yours is never ending a turn there, and throwing him onto it. In a trio, he hits 5% harder; solo and in a duo, nothing changes.
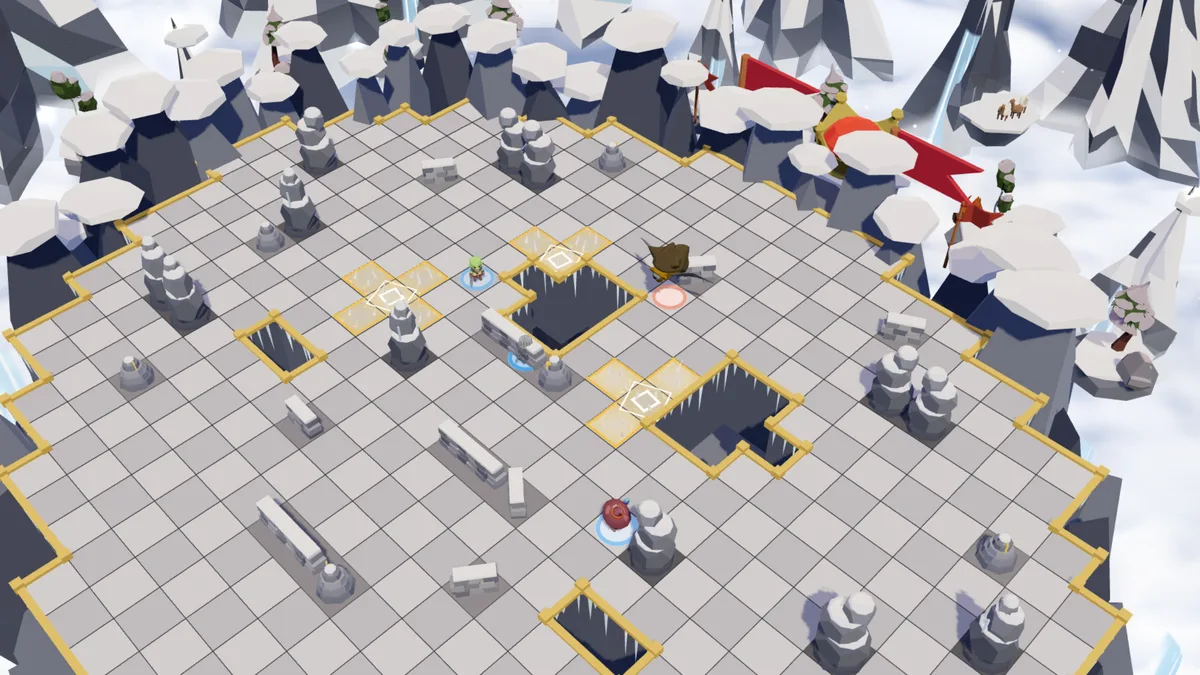
| Fighter | HP solo | HP duo | HP trio | AP | MP | Role |
|---|---|---|---|---|---|---|
| Alpaca King | 14 000 | 14 000 | 14 000 | 14 | 6 | Boss |
His spells
| Spell | AP | Range | Per turn | Effect |
|---|---|---|---|---|
| Frost Glyph | 2 | 2 – 6 | 1 | Lays a permanent frost glyph in a diamond, 2 to 6 tiles away, without line of sight: the target tile and the 4 around it (13 tiles, a radius of two, below half his HP). Anyone who ends their turn on it is shattered — only he is safe there. Two per turn. He stops laying them once they cover 40% of the map, and never lays one that would cut the plateau in two or leave a tile more than 3 steps from safe ground. |
| Buck | 4 | 1 | 2 | 60 to 75 melee damage, and the target is pushed back 3 tiles in line (4 below half his HP). A wall, an obstacle, the edge of the plateau or another entity stops it: 30 collision damage per missing tile. Twice per turn, never the same target twice. |
| Spit | 3 | 2 – 6 | 2 | 35 to 45 damage in a straight line, 2 to 6 tiles away, in line of sight: the target is pushed back 3 tiles (30 collision damage per missing tile) and, glued with spit, loses 2 MP on their next turn. Twice per turn, never the same target twice. |
| Royal Leap | 2 | 2 – 4 | 1 | He leaps to a free tile 2 to 4 tiles away, in line of sight: never over an obstacle. Once per turn. |
| Stampede | 4 | 2 – 6 | 1 | Alpaking Evolved only. He charges in a straight line, up to 6 tiles: every entity in his path is knocked 1 tile aside and takes 45 to 60 damage; an obstacle stops the charge. Once every three turns. |
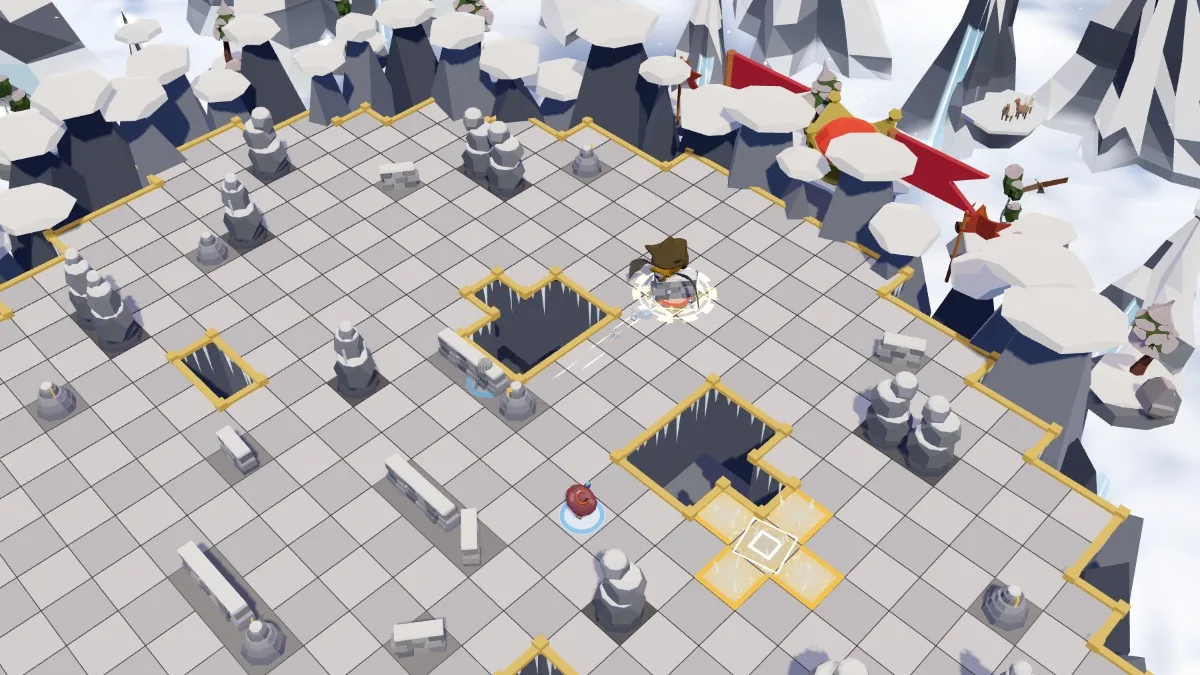
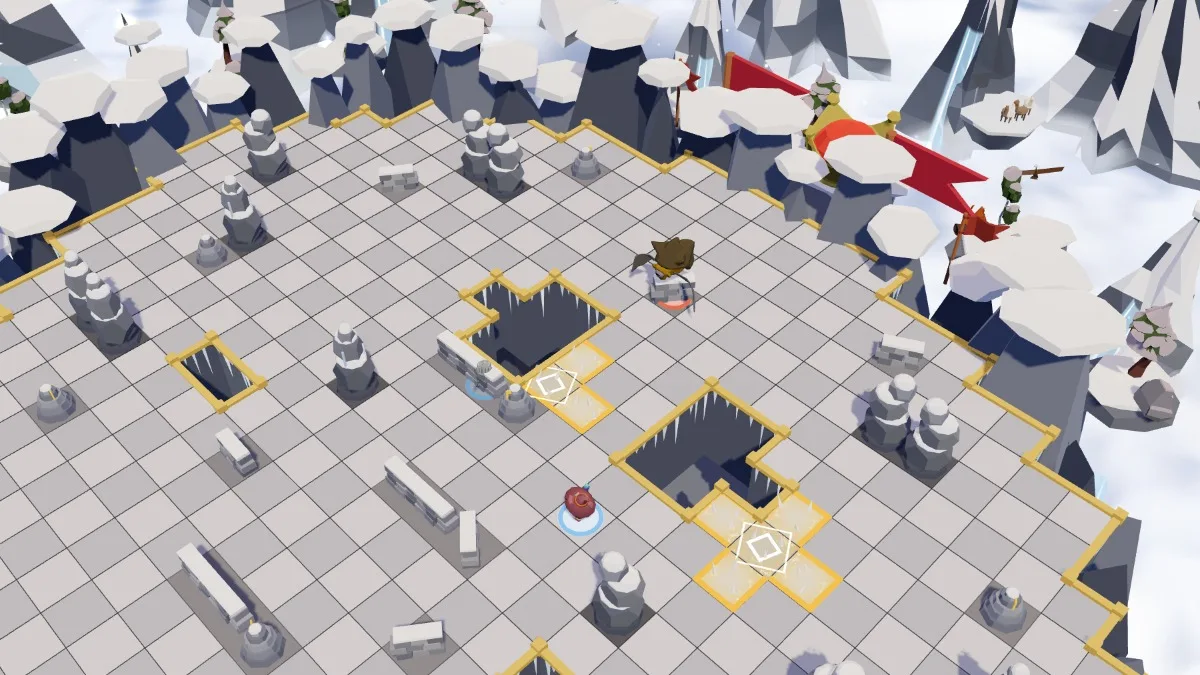
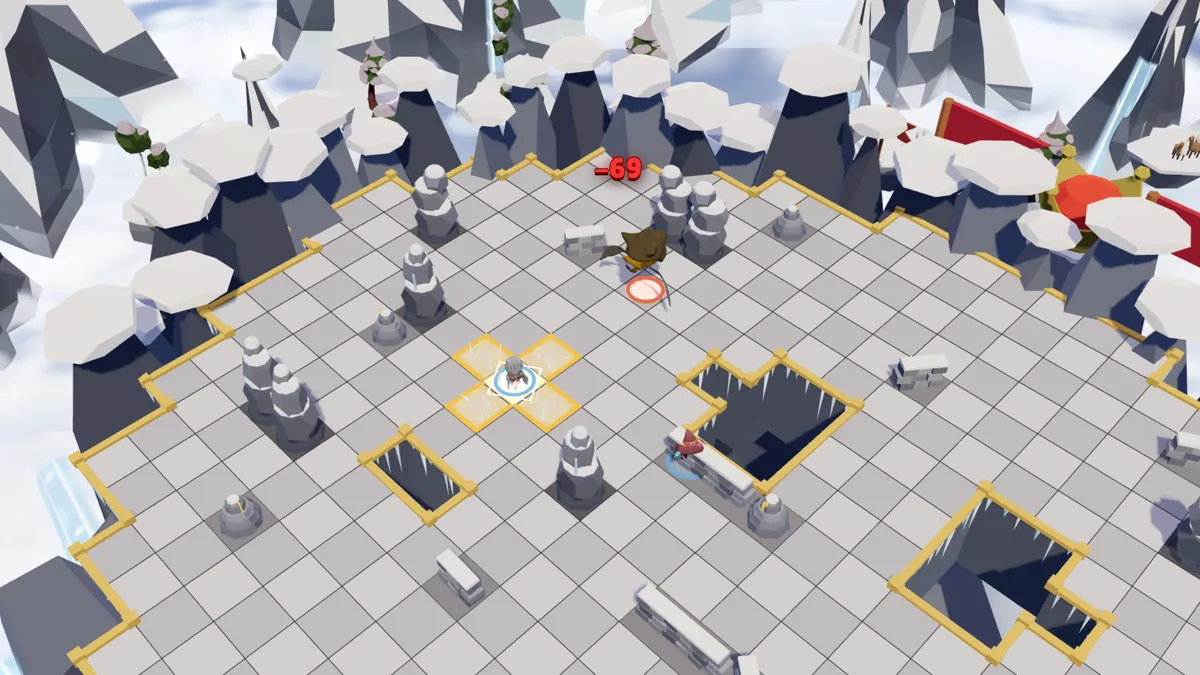
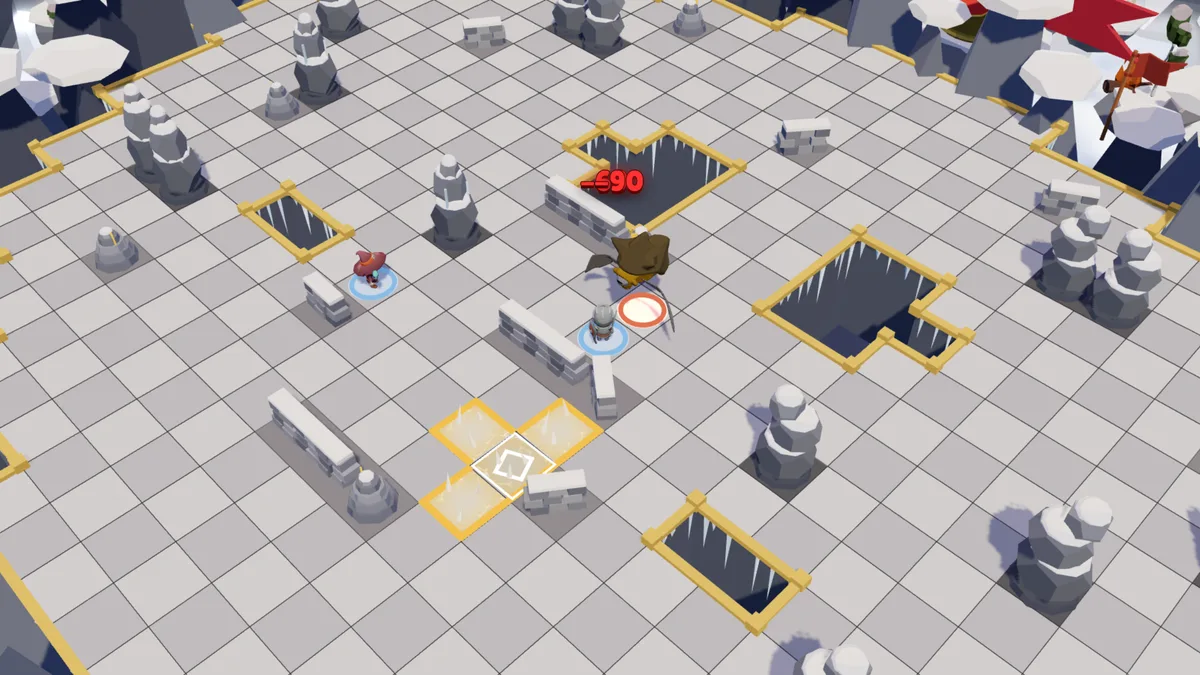
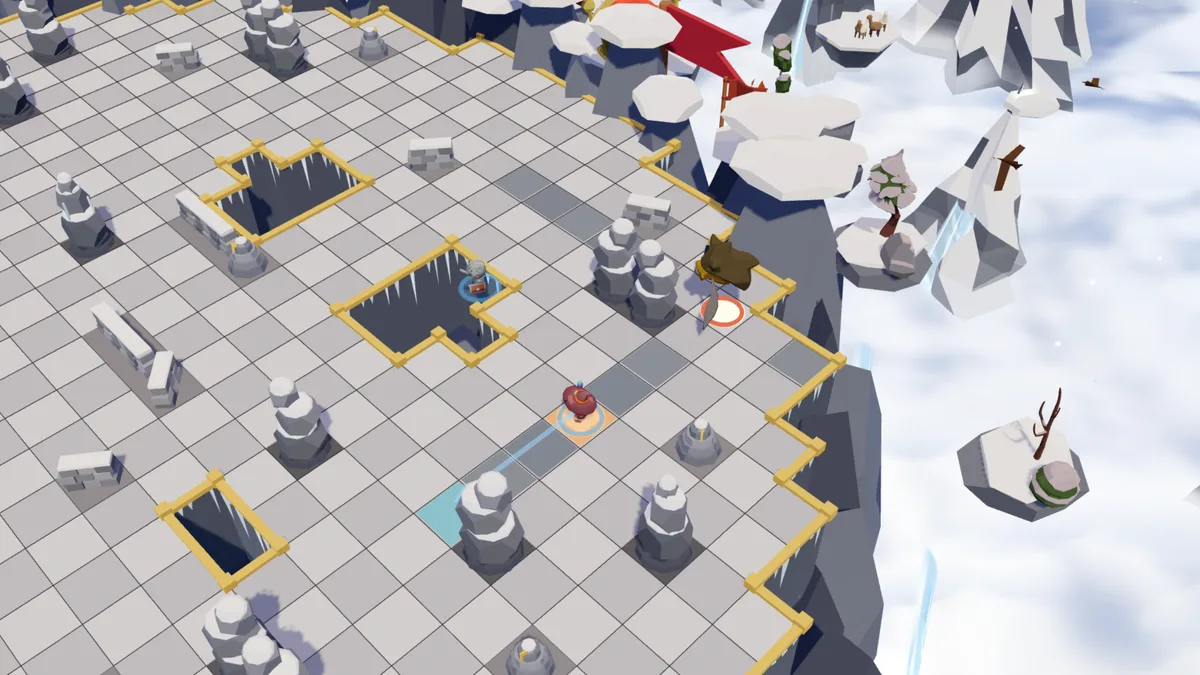
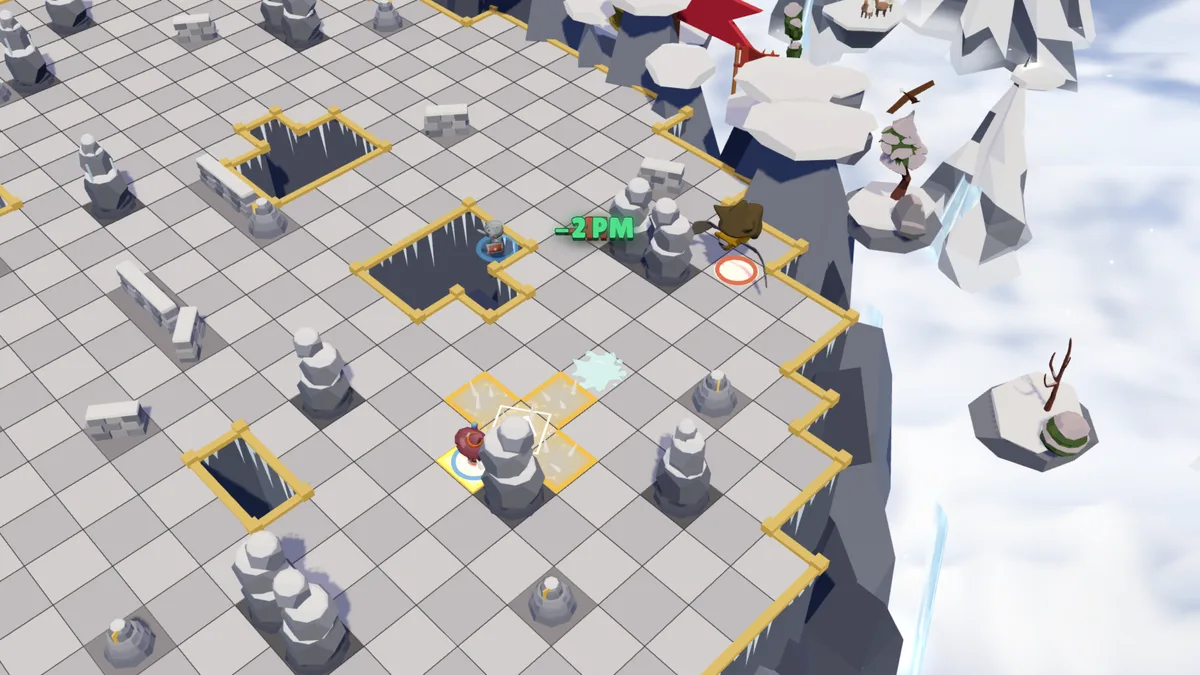
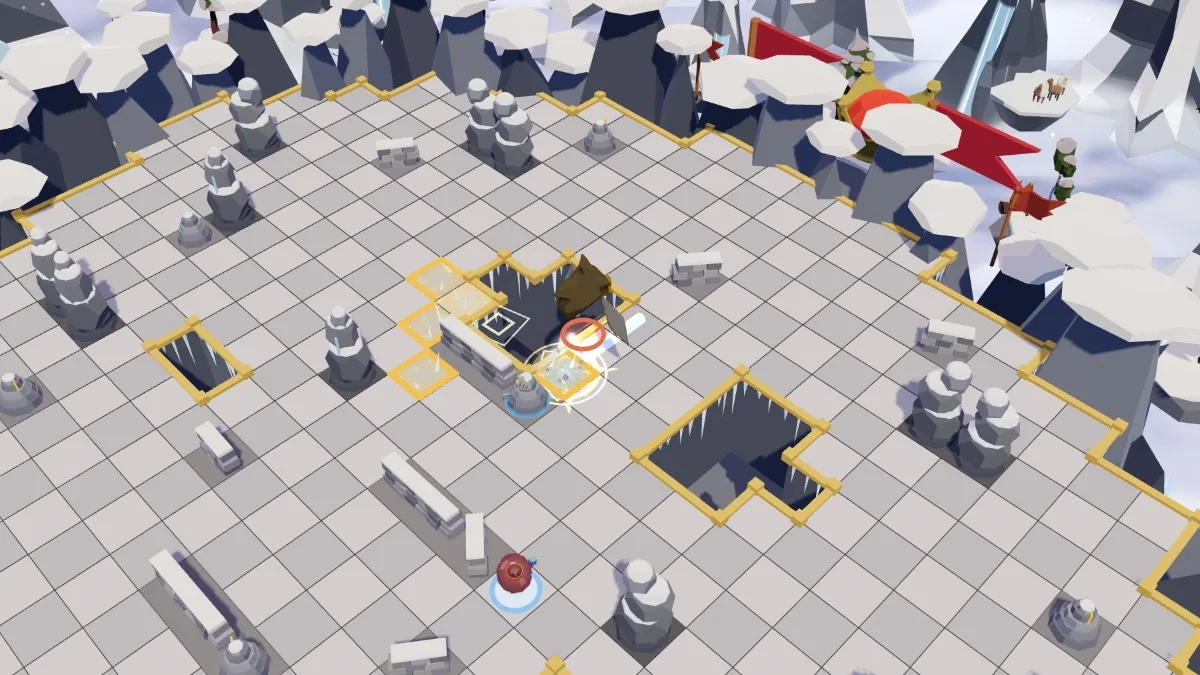
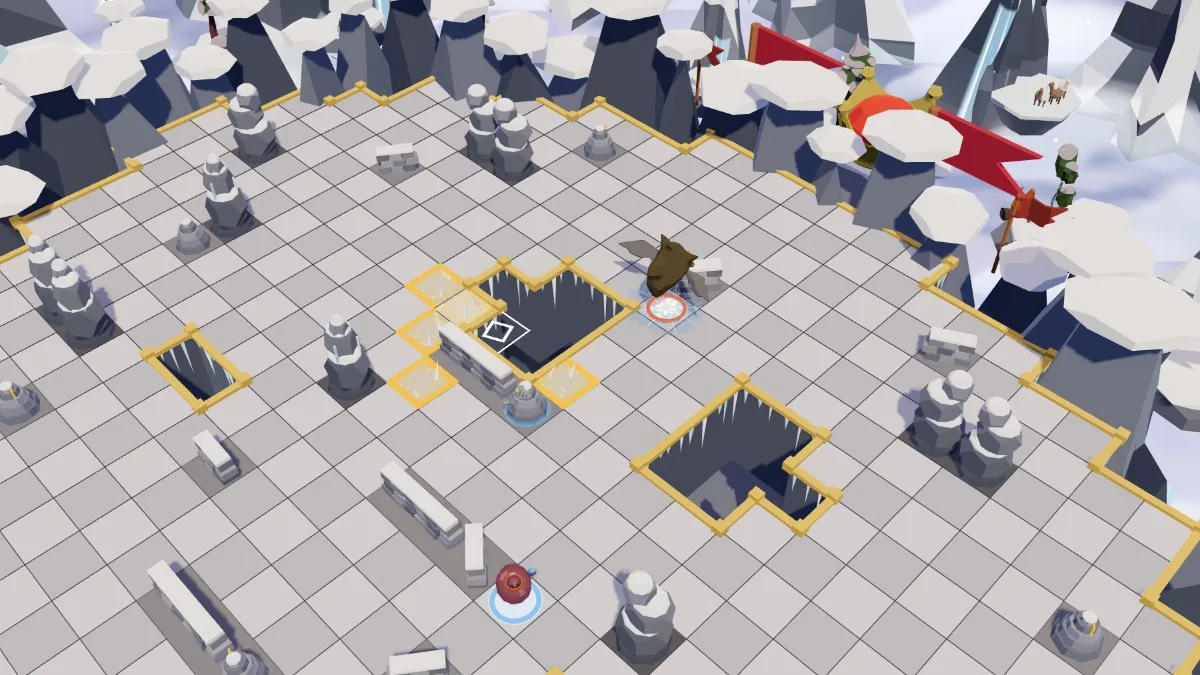
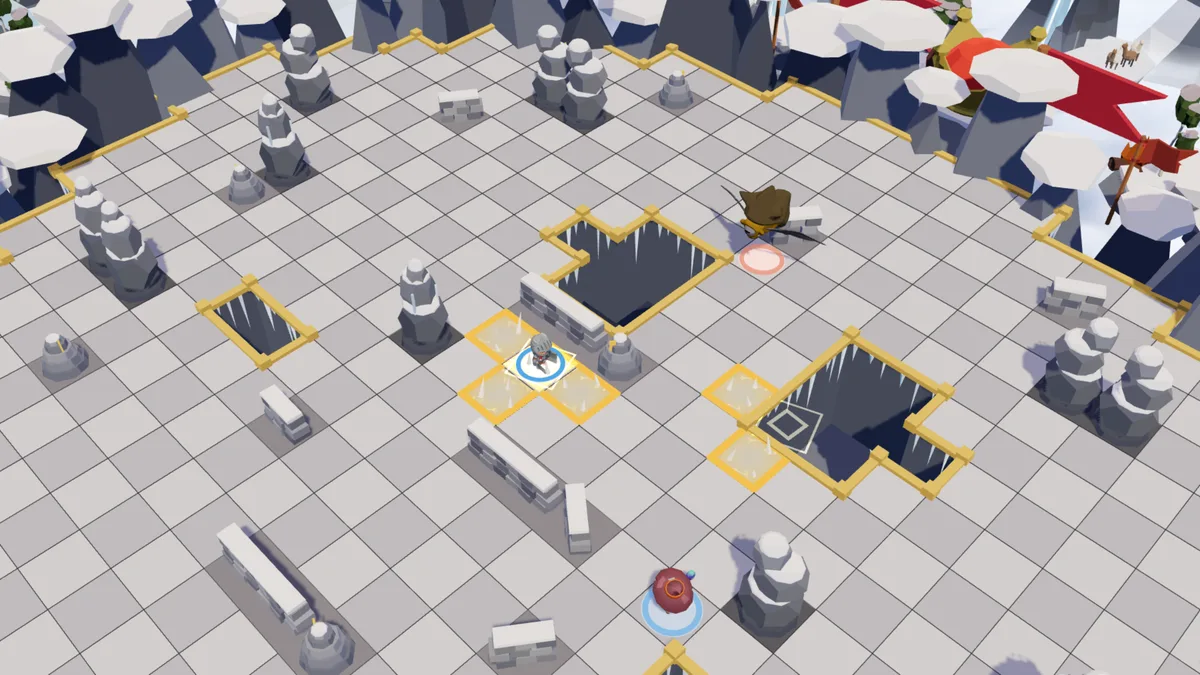
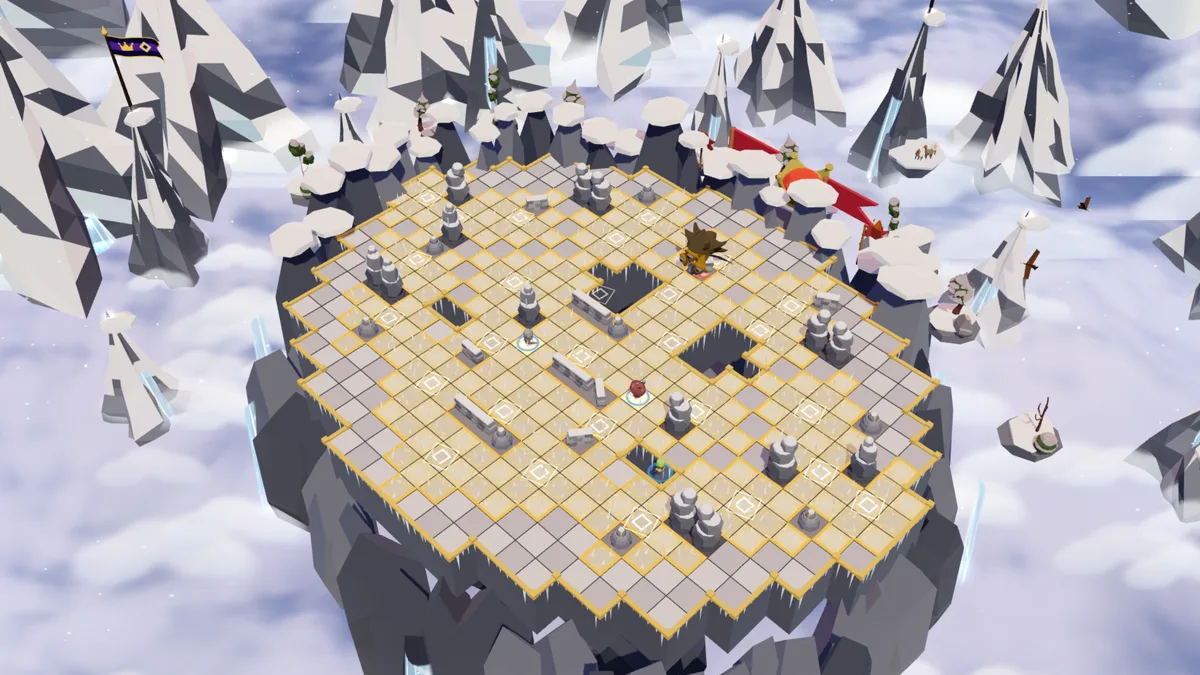
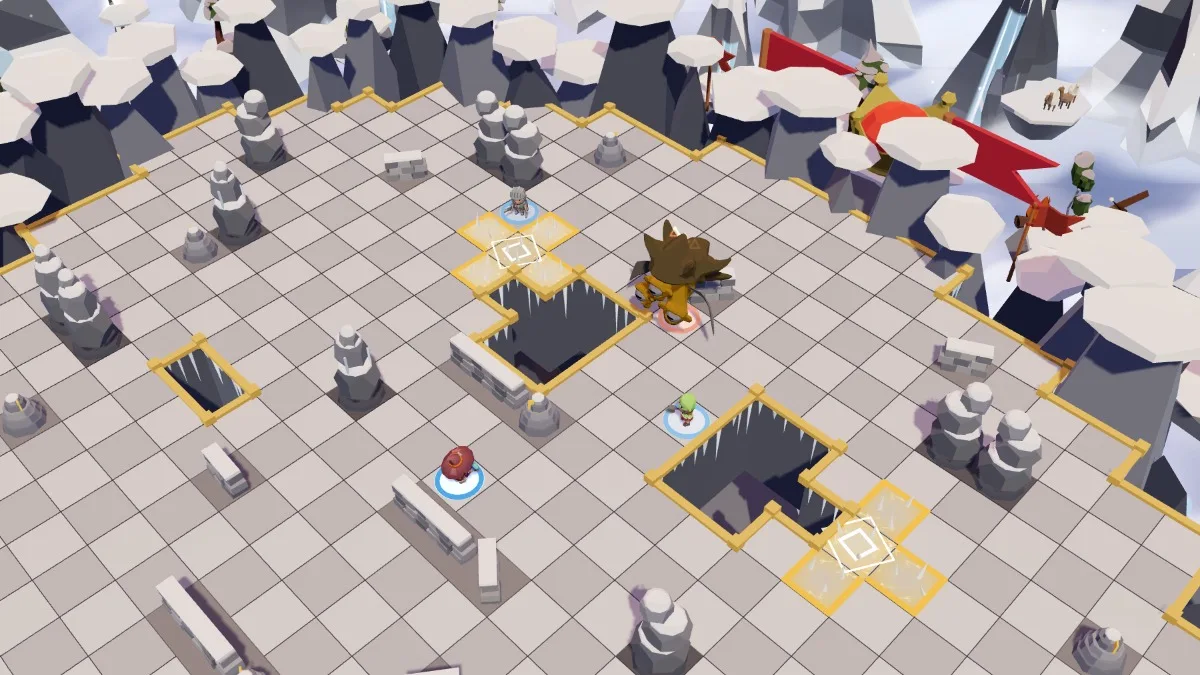
- Frost Glyph — a golden diamond-shaped seal, 2 to 6 tiles from him, without line of sight: the target tile and the four around it, 5 tiles in all. It never fades. He lays two per turn, often on your path or behind you, where his pushes will send you. Only he walks on them safely.
- Buck — his melee blow, to break free: the hero stuck to him is pushed back 3 tiles in line (4 once evolved). A rock, a low wall, the edge, a crevasse or another fighter stops the push: you then take 30 impact damage per missing tile, but you don’t move. Two per turn, never twice on the same hero.
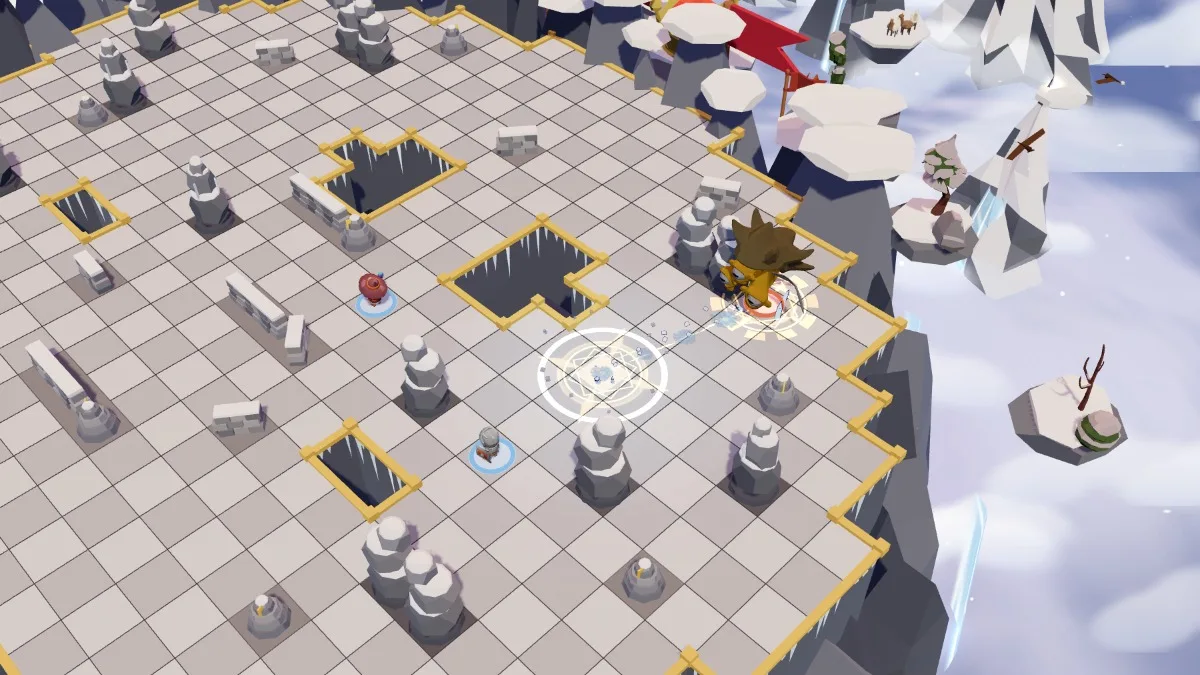
- Spit — in a straight line only, up to 6 tiles, in line of sight: the target is pushed back 3 tiles and, glued with spit, loses 2 MP on their next turn; stopped by an obstacle, they take the shock, 30 per missing tile. It is his most dangerous spell: it pushes you onto a glyph, then takes away what you need to get off it.
- Royal Leap — his escape: a jump of up to 4 tiles, in line of sight: never over a rock or a low wall. When you stick to him and his MP are not enough, he leaves. Don’t count on keeping him in melee two turns in a row.
- Stampede — the Alpaking Evolved only: a charge in a straight line of up to 6 tiles. Every entity in his path is knocked one tile aside, towards a glyph if there is one, and takes the hit. An obstacle stops the charge; so does an anchored hero, who takes the impact on top. Once every three turns.
- Royal Fleece, his passive — 30% permanent resistance: the window when he is stunned is worth all the more.
The frost glyphs
A glyph does not hurt whoever crosses it: you can walk on it, be pushed onto it, start your turn on it. Only the end of your turn counts. A hero who ends their turn on a glyph is shattered, whatever their HP; so are their stationary entities left on it, explosive charges and War banner included. A summon that plays its own turn falls there too if it ends it on one. The King’s side, for its part, has nothing to fear there.
The glyphs stay until the end of the fight: the plateau shrinks every turn. But he never lays a glyph on a heroes’ starting tile, nor one that would cut the safe ground in two, nor one that would leave a frozen tile more than 3 steps from safe ground. There is always a way out. The danger is no longer having the MP to take it: one Spit, and the spit takes two of them away.
The stunned King
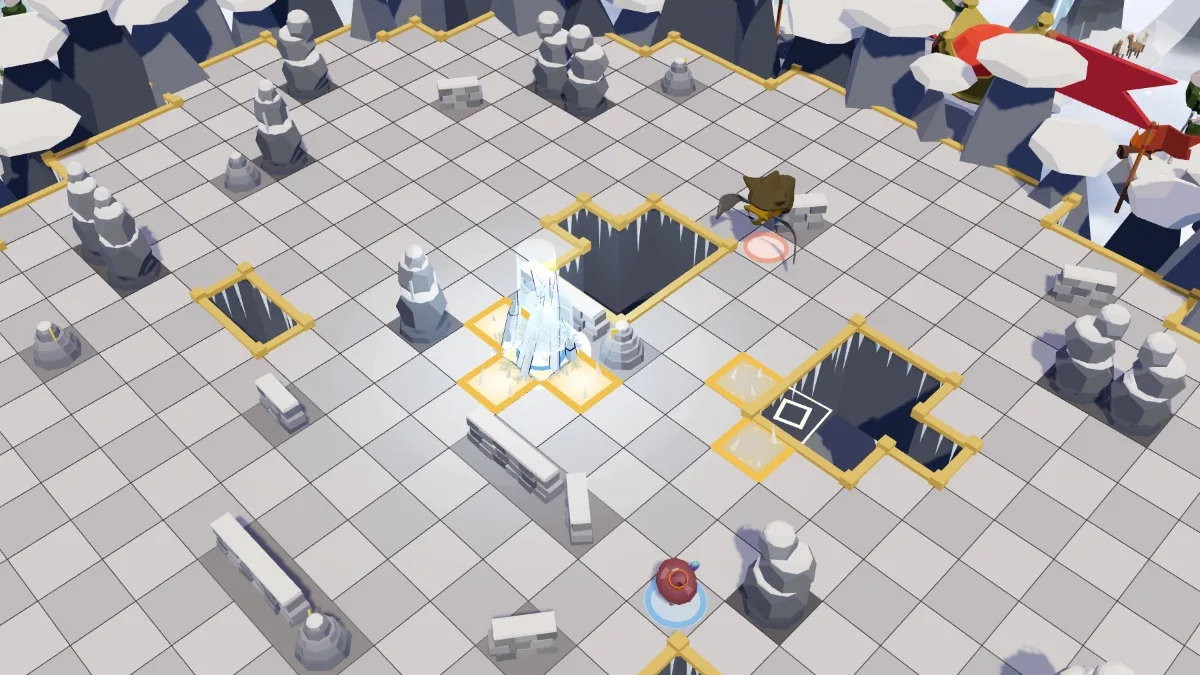
It is your weapon against him. When a hero’s spell moves him — pushed, pulled, swapped or teleported — and he ends that movement on one of his glyphs, he is stunned. A hero’s trap that throws him onto a glyph stuns him too. It is not enough for him to walk onto one by himself: you have to send him there.
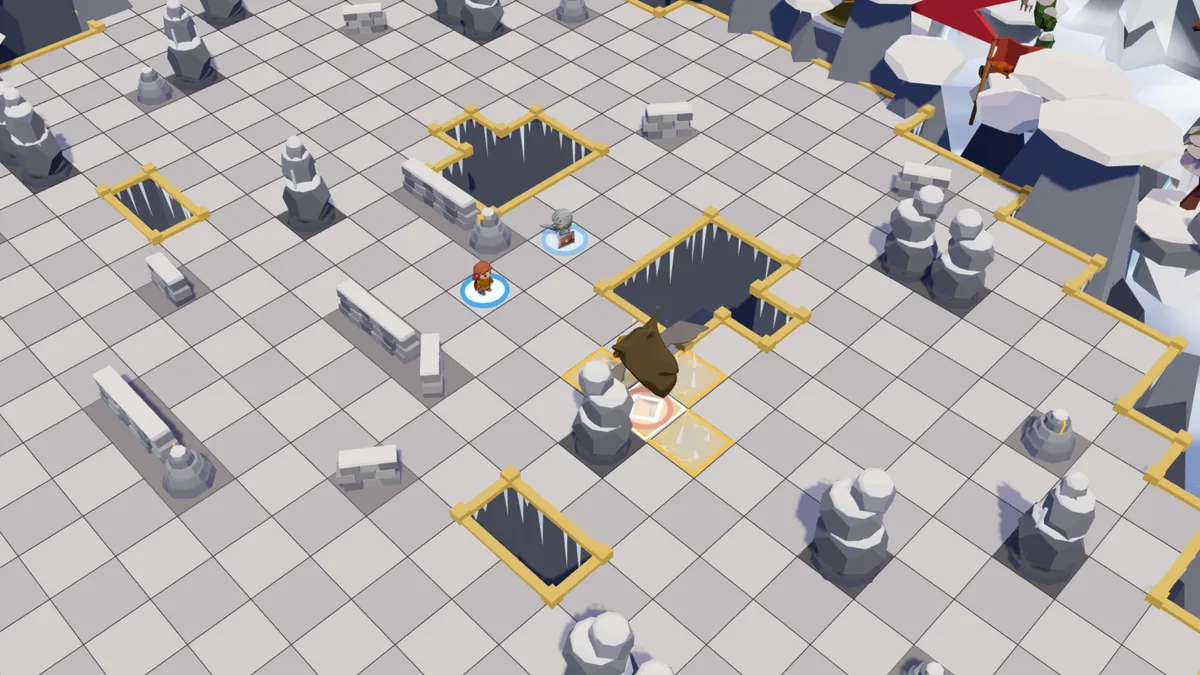
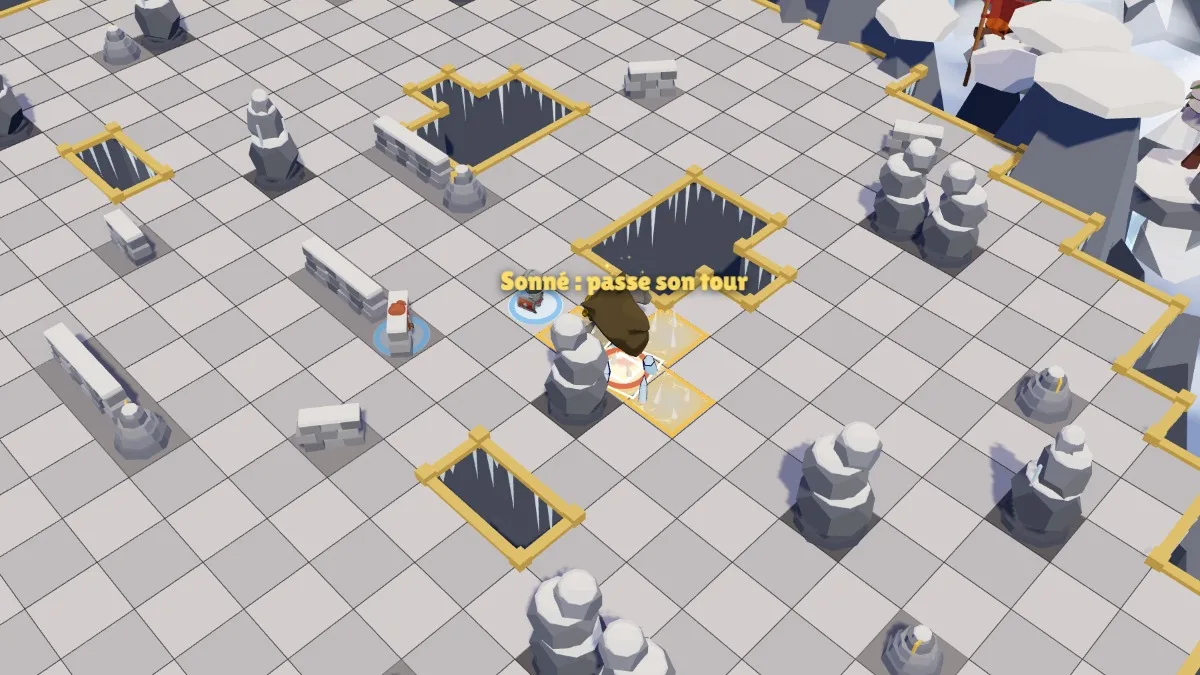
Stunned, he skips his next turn, with no glyph, no Buck, no Spit, and takes 50% more damage until the turn after. The avalanche, though, still sweeps the plateau. Afterwards, he plays at least 4 of his turns before he can be stunned again. To stun him, you therefore need two things: a glyph right next to him, and a spell that sends him onto it. He lays his glyphs around you; the further the fight goes, the more of them he has around him.
The avalanche
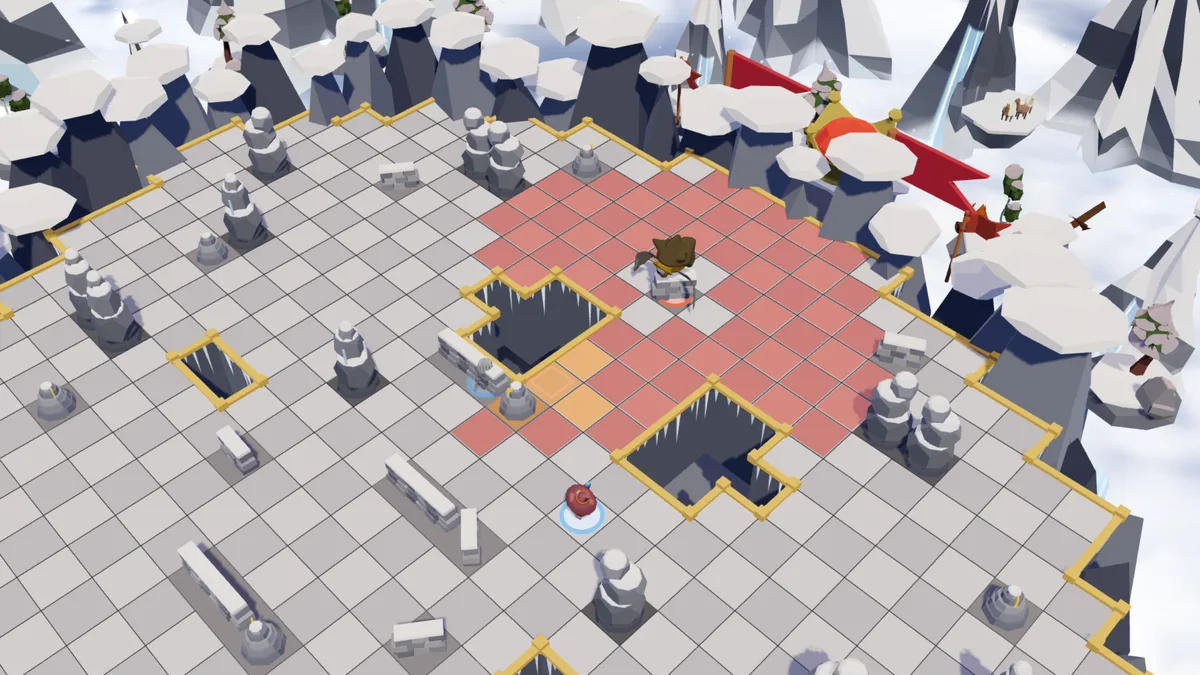
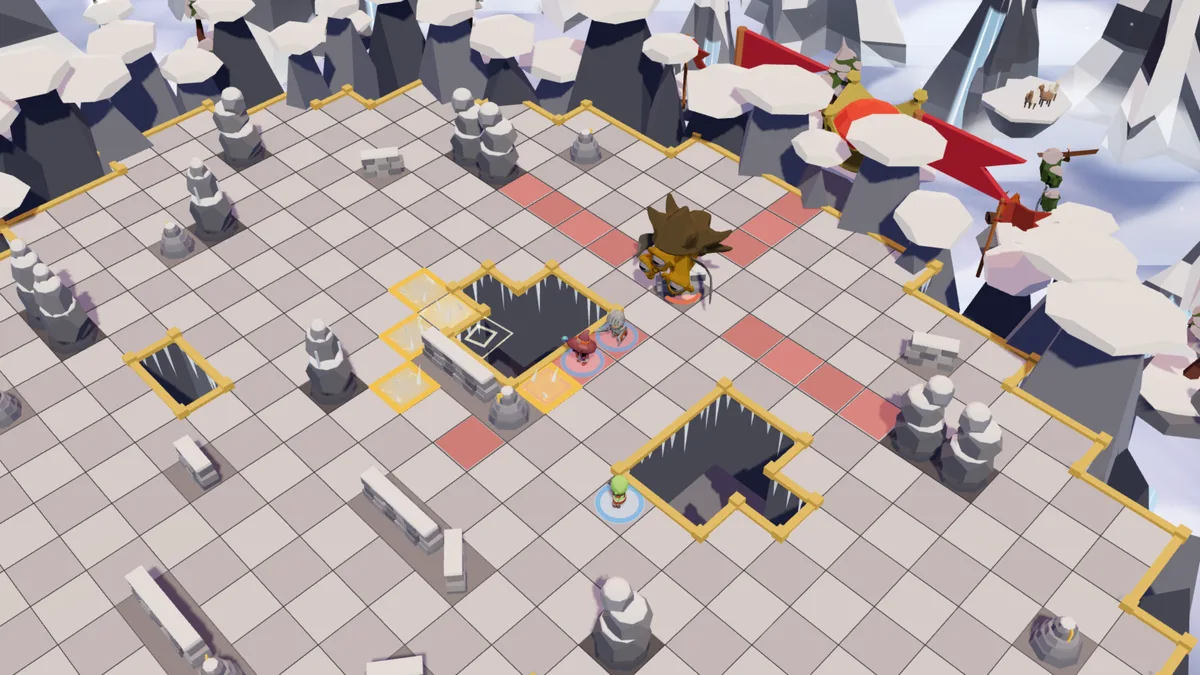
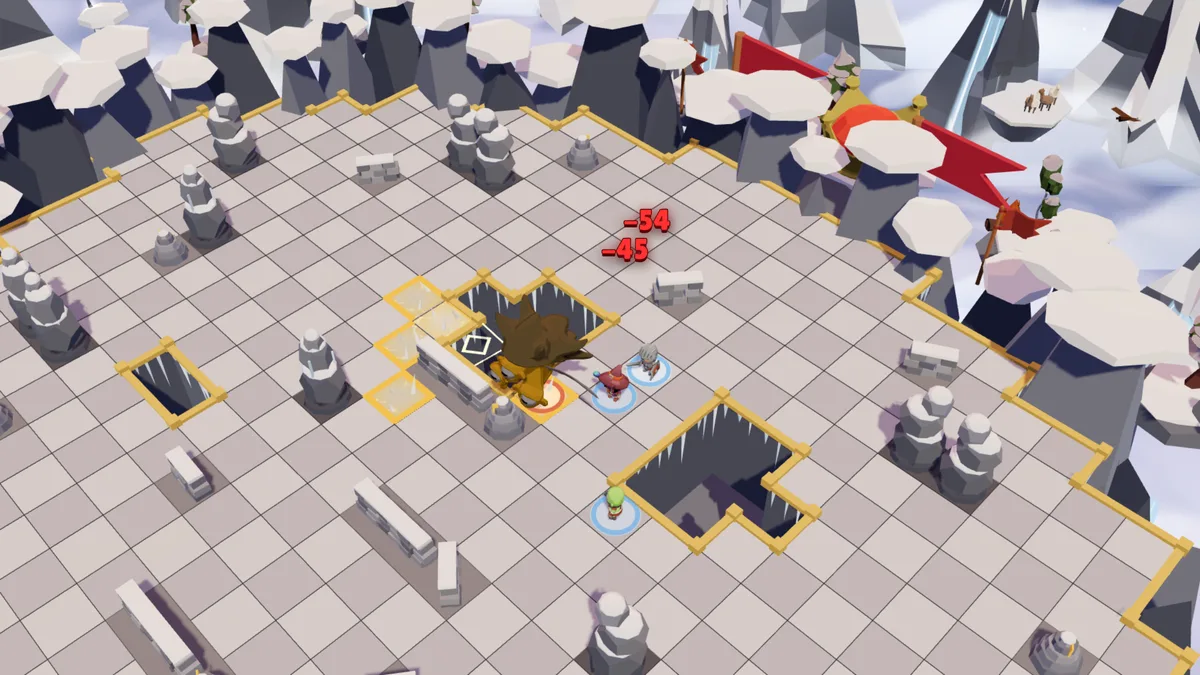
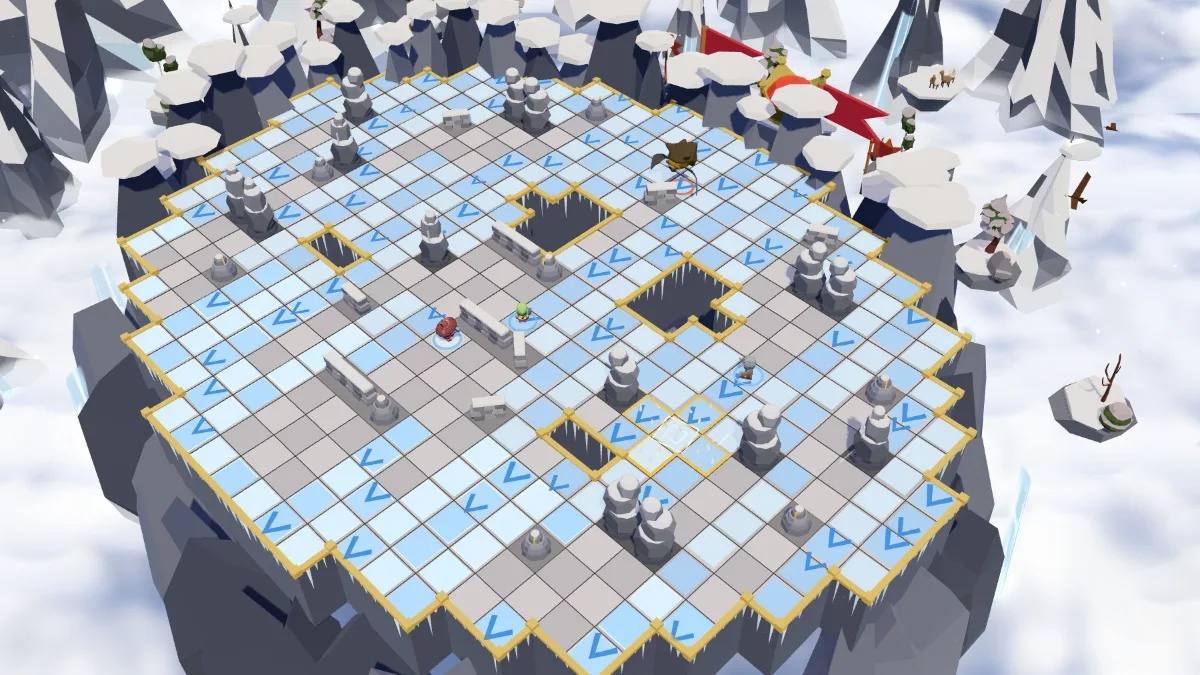
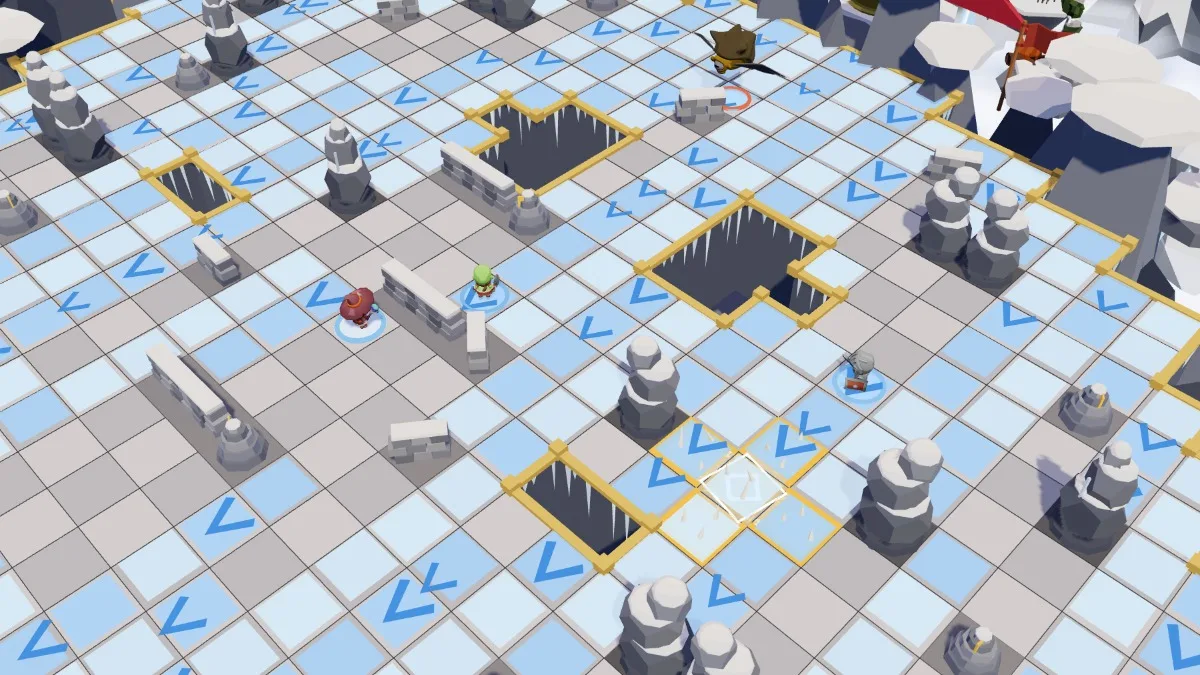
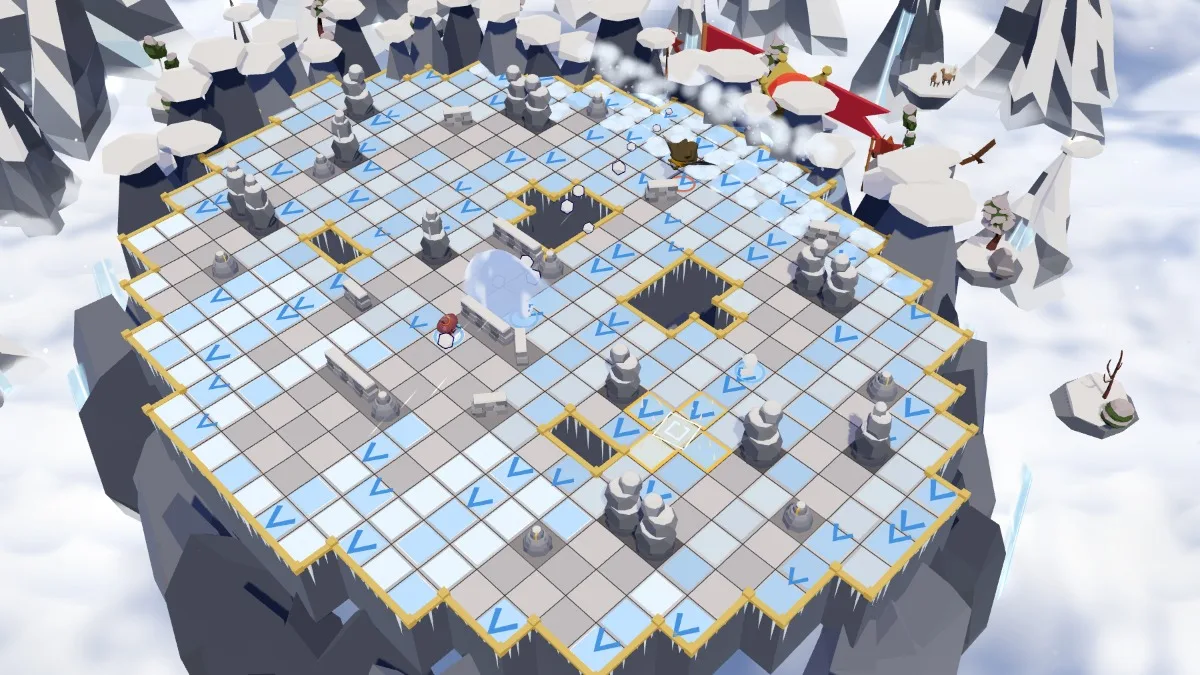
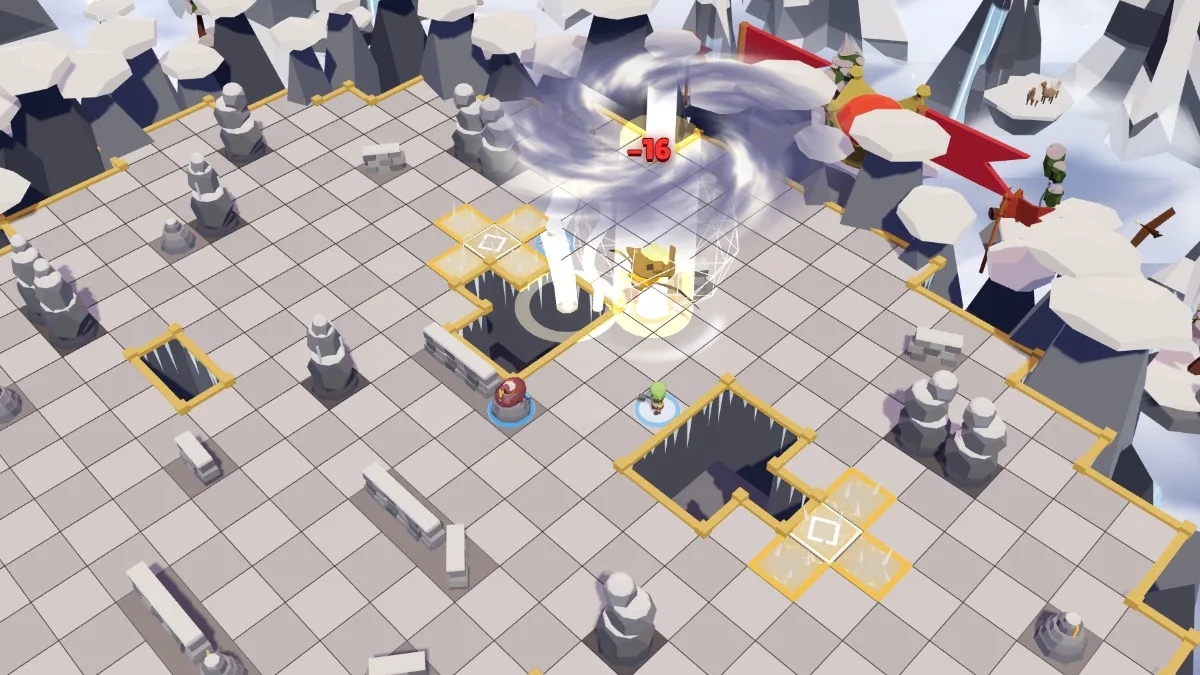
The plateau’s event: a wind of snow. At the start of his 3rd turn, then every 3 of his turns, an avalanche sweeps the whole plateau, in one of the four directions. It is announced at the start of his previous turn: the plateau trembles, arrows show the wind’s direction, and only the sheltered tiles stay calm. So you have a whole turn to take shelter.
A tile is sheltered when a rock or a low wall stands between it and the wind, 3 tiles away at most, on the same line. The void of the crevasses gives no shelter, and neither does an ally. At the start of his next turn, every hero in the open is carried 3 tiles in the wind’s direction and takes 35 to 45 damage. The heavier cost lies elsewhere: a rock, a low wall, the edge or another fighter that stops them costs 30 impact damage per missing tile. Pressed against an obstacle on the side the wind comes from, you don’t move, but you take the impact of all three tiles. He is never hit, nor are your summons. He picks the direction that throws the most heroes onto his glyphs. Evolved or not, only one avalanche at a time.
The covered plateau
His glyphs don’t fade, but they have a limit. Once they cover 40% of the ground, he stops laying them. In return, he hits 25% harder until the end of the fight. In a long fight, that is often where everything is decided: less room for you, more glyphs around him to stun him on, and heavier blows.
His evolution
Below 50% of his HP, he evolves into the Alpaking Evolved. He bucks as he transforms: your heroes are pushed back 2 tiles, and a glyph may be waiting where they land. Evolved, he has 3 AP more on each of his turns; his glyphs cover 13 tiles, a radius of two; his Buck pushes further; and Stampede joins his spells. The centre of an evolved glyph is three steps from its edge: after a Spit, walking is not always enough any more.
| Tier | HP left | What changes |
|---|---|---|
| Alpaking | 50 to 100% | 2 frost glyphs per turn, of 5 tiles; Buck pushes back 3 tiles; the avalanche sweeps the whole plateau |
| Alpaking Evolved | below 50% | 13-tile glyphs; Buck pushes back 4 tiles; +3 AP every turn; Stampede |
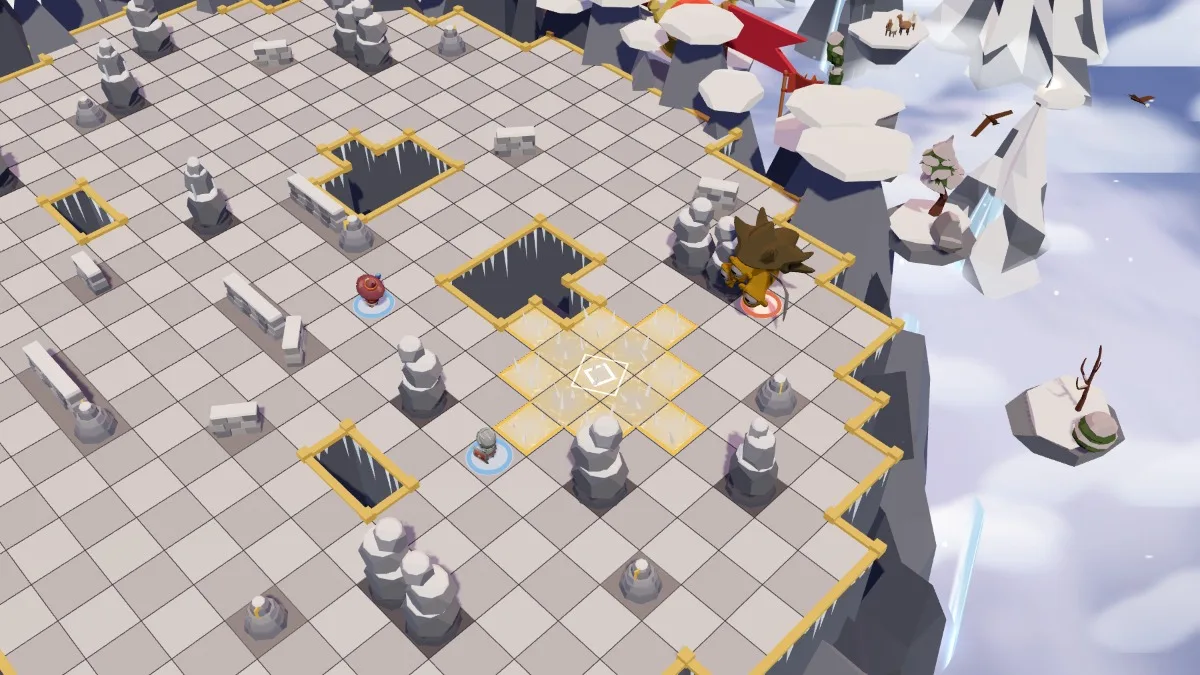
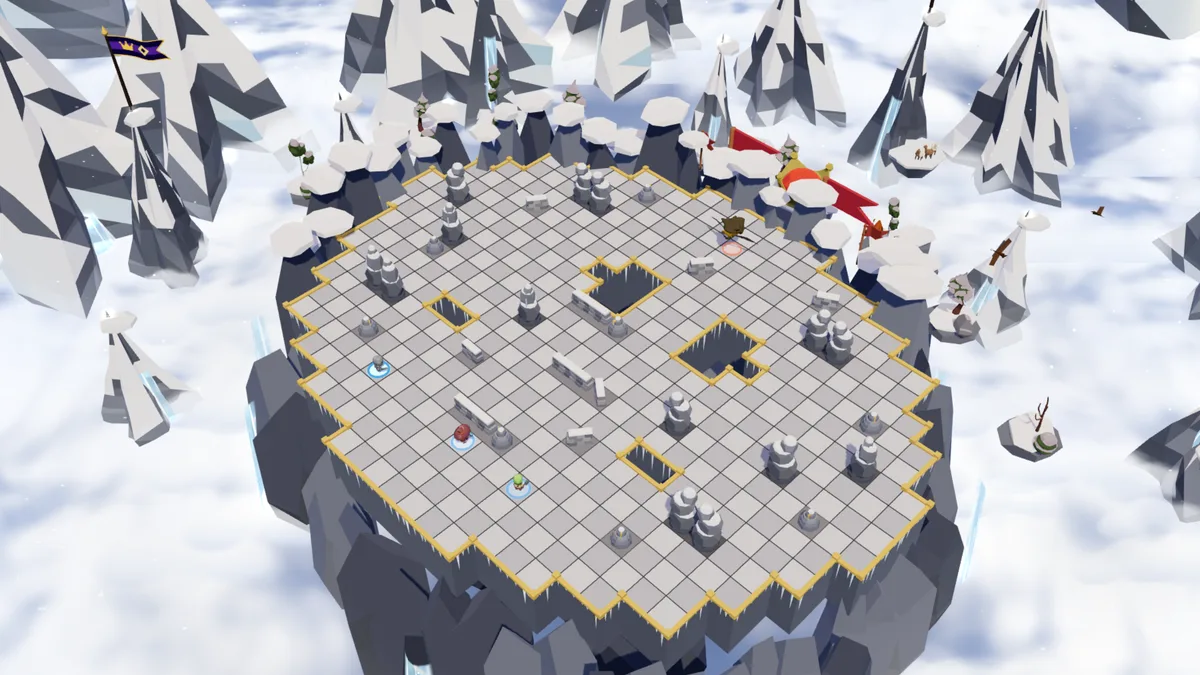
The King’s Plateau
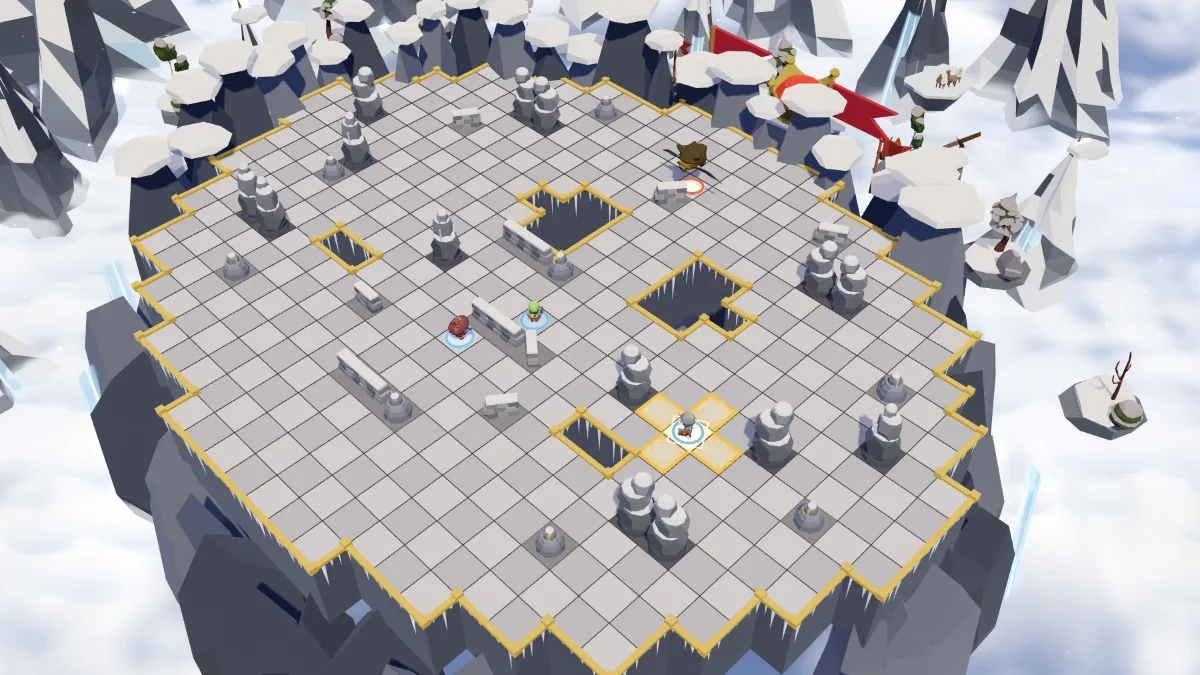
A high, round plateau, set on a peak above the clouds. The King starts at the top; your heroes, at the bottom. The edge is a cliff: it stops a push, with the impact. In the centre, two crevasses leave a three-tile bridge: a void, which does not block sight but cannot be crossed. The snowy rocks are walls: they block sight and stop everything. The dry-stone walls are low: you can see and aim over them, but they stop a push, with the impact. Above all, rocks and low walls are the avalanche’s shelters: behind them, the wind doesn’t carry you away. His side of the plateau has little cover; yours has more.
How to beat him
- Never end your turn on a glyph: shattered, whatever your HP. Before you play, check where you will end up, and keep enough to get out.
- His damage comes from his pushes: his direct hits are modest; what costs you is being pushed into an obstacle, 30 damage per missing tile, or onto a glyph. Keep a clear lane behind you, in line with his Buck and his Spit: pushed onto safe ground, you lose almost nothing.
- Only back up against a low wall to avoid a glyph: it holds you in place, but you take the impact of every missing tile.
- Don’t stay in a straight line with him: Spit only travels in a straight line; on a diagonal, neither it nor its spit can reach you.
- Keep a move that costs no MP: a jump, a teleport, a swap. The spit takes two MP from you, and an evolved glyph takes three to get out of.
- Stun him, then all hit: the damage he takes rises by half until his following turn. Save your big spells for that turn.
- When the avalanche is announced, take shelter: behind a rock or a low wall, on the side away from the wind. You have a whole turn, and he picks the direction that throws you onto his glyphs.
Solo, duo, trio
- Solo — you are his only target, but his spells never hit the same hero twice in a turn: one Buck and one Spit at most. Stay out of his line when you are not hitting, and near a rock or a low wall that will shelter you from the avalanche. A class that moves enemies (Artificer, Clockmaker, Brute) stuns him on its own; with no ally to cash in on it, save your biggest spells for that turn.
- In a duo — his two Spits and his two Bucks are split between you. One role each: one sets up the stun and moves him, the other hits. When the avalanche is announced, don’t shelter one behind the other: an ally gives no shelter, and the one carried into the other costs you both an impact.
- In a trio — he hits 5% harder, and his Spits always find two targets. One hero to stun him, two to hit during the stun: that is where your damage soars. Shelter is scarce: when the avalanche is announced, share out the rocks and low walls, one hero per shelter.
Tips by class
- Warrior — Taunt pulls him in a straight line up to you: position yourself so that he ends up on a glyph at your feet. Warrior’s leap takes you off a glyph without spending MP. As a variant, Anchor, in place of the Leap, makes you immovable: neither the Buck, nor the Spit, nor the avalanche moves you. Celestial blade and Warrior’s wrath hit hard while he is stunned.
- Brute — Quake pulls everything in its cross two tiles towards its centre: aim at a glyph with the King in the cross, and he falls onto it. Intimidate pulls him one tile: the missing step. Charge brings you back into melee after a Buck, and Stoneskin soaks up his blows on the turn you stay stuck to him.
- Arcanist — you don’t move him: you hit. Comet and Blast are for the turn he is stunned. Blink takes you off a glyph without spending MP, even glued with spit. Fire bolt hits him from afar, out of the line of his Spit.
- Shade — Fear makes him flee in a straight line towards the tile you target: pick a glyph behind him. Hook trap pulls one tile towards its centre: laid at the edge of a glyph, it throws him onto it, and a hero’s trap stuns him too. Shadow veil gives you MP back on the turn the spit took some from you.
- Clockmaker — Reversal throws him to the other side of you, at the same distance: stand between him and a glyph. Pivot moves him to the opposite arm of its cross, and Winder sends him back to the tile where he started his turn, if it was a glyph. Reflection and Recall take you off a glyph without spending MP.
- Artificer — Shove pushes him three tiles: the surest way to stun him. Grapeshot pushes him one tile, to finish the job. Don’t leave your charges on a glyph: they are shattered there when your turn ends. Roll takes you off the frost and gives you an MP back; as a variant, Diving bell anchors you against his pushes.
Common mistakes
- Ending your turn on a glyph “for one tile”: shattered, and the fight goes on without you.
- Forgetting the spit: after a Spit, two MP fewer on the next turn; you think you are getting off the glyph, and you stay on it.
- Staying in the open when the avalanche is announced: it carries you three tiles, often onto a glyph.
- Hugging a rock on the windward side: it doesn’t shelter you, it stops you; you take the impact of all three tiles.
- Sticking to him with nothing at your back: his Buck sends you back along the line, straight where he wanted.
- Hitting hard before stunning him: the extra half of damage is wasted. Stun first, then hit.
The weekly boss
The Alpaca King is the weekly boss from Sunday 1 November 2026 at noon: the Waris boss and the weekly boss in USDC are played against him. Win or lose, a boss’s loot gives no Waris, only crystal chances for every % of its HP your team takes off: a 0.3% chance of a Common Crystal in the Waris boss; 1.5% for a Common Crystal and 0.05% for a Legendary Crystal in the weekly boss in USDC. The leaderboard, the prize pool and the loot in detail are on the Loot page.
There is no defeat against a boss: bringing it down is a victory, falling before that counts neither as a defeat nor as a victory. Experience, like the loot, follows the share of its HP your team took off.
Frequently asked questions
What happens if I end my turn on a glyph?
Your hero is shattered: they fall, whatever their HP. Your charges and your banner left on a glyph are too, at the end of your turn.
Can you walk on a frost glyph?
Yes. Crossing it, being pushed onto it or starting your turn on it costs nothing. Only the end of your turn counts: leave it before you end it.
How do you stun the Alpaca King?
By moving him onto one of his glyphs with a hero’s spell or trap: push, pull, swap, teleport. Stunned, he skips his next turn and takes half again as much damage until the turn after.
Do his glyphs disappear?
No: they stay until the end of the fight. He stops laying them once they cover a good share of the plateau, but then hits harder.
How do you avoid the avalanche?
Take shelter as soon as it is announced: behind a rock or a low wall, three tiles away at most, on the side away from the wind. It sweeps the rest of the plateau at the start of the King’s next turn. Crevasses give no shelter, and neither does an ally. With no shelter in reach, leave yourself room in the wind’s direction: carried onto safe ground, you only take its damage; stopped dead, you take the impact as well.
Can the King be shattered by his own glyphs?
No: he walks on them safely, and ends his turns on them. But moved onto one by a hero, he is stunned.